
Glossy white keypad styled with rhinestone accents.
Confident Start: Streamline Your Manicure Station in One Week
Adopt a deliberate routine and your team will operate the ONAIL Wireless Keypad with precision and speed by the end of seven days.
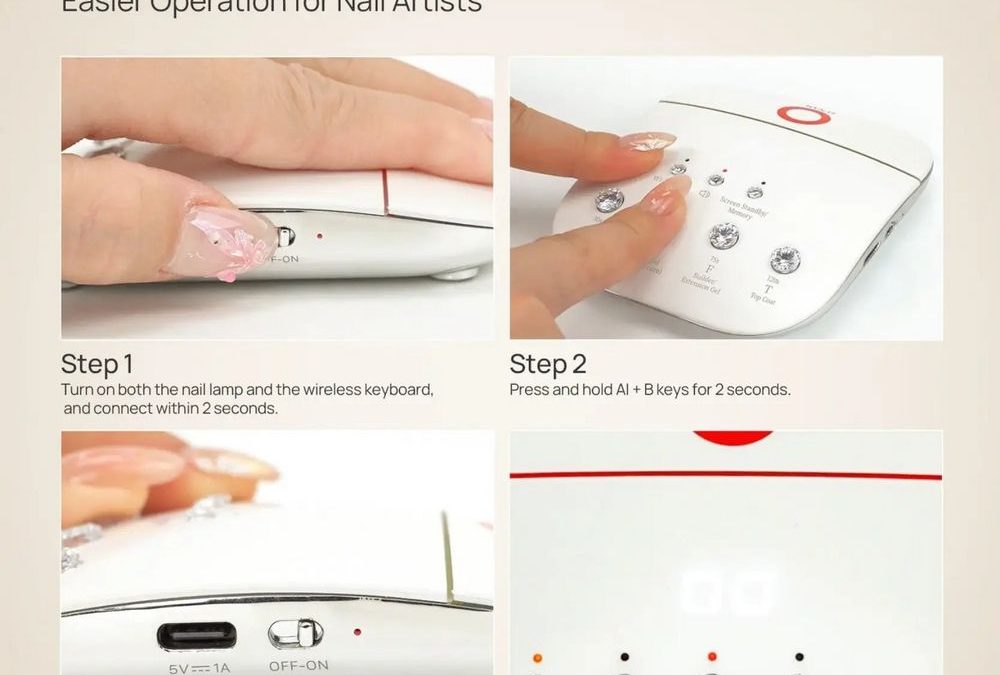
Begin by reviewing the keypad details and pairing steps; see the product listing ONAIL Wireless Keypad for quick reference before scheduling hands-on practice.
Week Overview and Setup Checklist
Reserve short, focused sessions each day—15–30 minutes—so technicians build a reliable habit without disrupting appointments. You will rotate one or two techs through the practice slot while the rest of the team observes or assists.
Prepare: unpack the keypad, confirm the color and cosmetic condition, place it on a clean workstation surface with a soft textile or tulle-like pad to mirror the device’s aesthetic, and ensure you have a compatible ONAIL AI lamp nearby. Charge the keypad via USB Type-C if needed and keep the user manual available.
Day 1: Unpack, Inspect, and Basic Familiarization
Goal: Know the keypad by sight, feel, and placement choices.
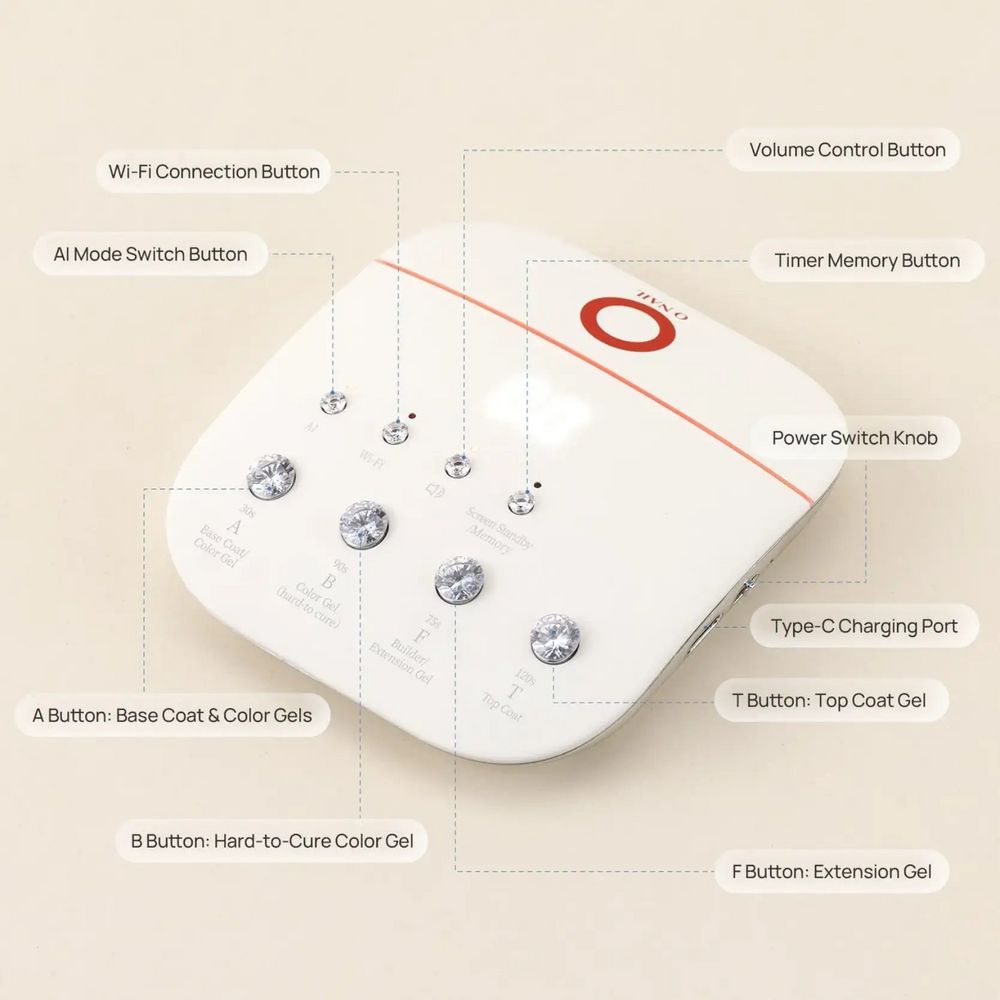
- Unbox and inspect the compact keypad, noting the glossy white finish, pale peach accent line, and the red logo.
- Examine the rhinestone-embellished buttons and rounded edges to understand cleaning implications and client-facing presentation.
- Place the keypad at typical manicure distances and test reach for both left- and right-handed technicians.
Day 2: Power Management and Charging Routine
Goal: Make charging and battery care routine and predictable.
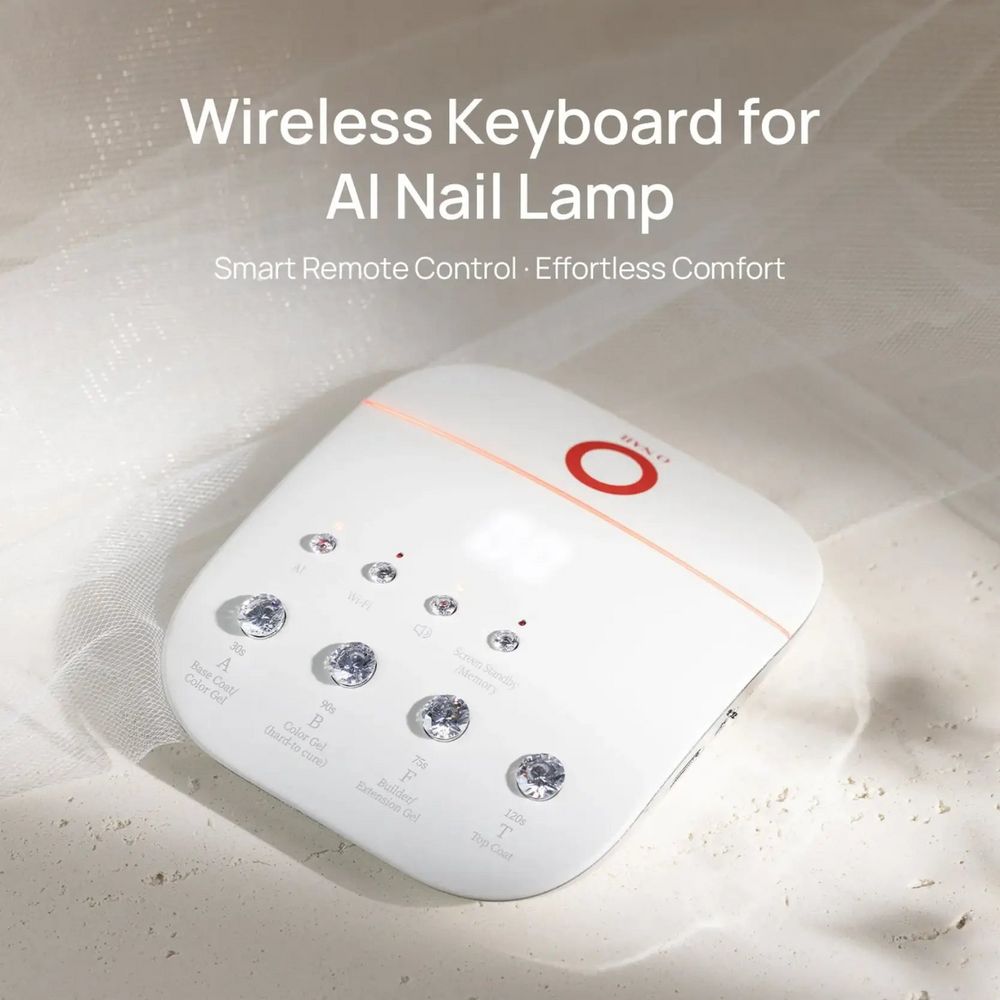
Pale peach accent line and prominent red logo on display.
- Turn the keypad on and off to learn its startup behavior and indicators.
- Practice charging with a Type-C cable; note the rated input to match chargers on hand.
- Create a charging schedule for devices kept in standby to avoid last-minute dead batteries during back-to-back bookings.
Day 3: Pairing Practice and Troubleshooting
Goal: Confidently pair the keypad to the lamp and resolve common pairing failures.
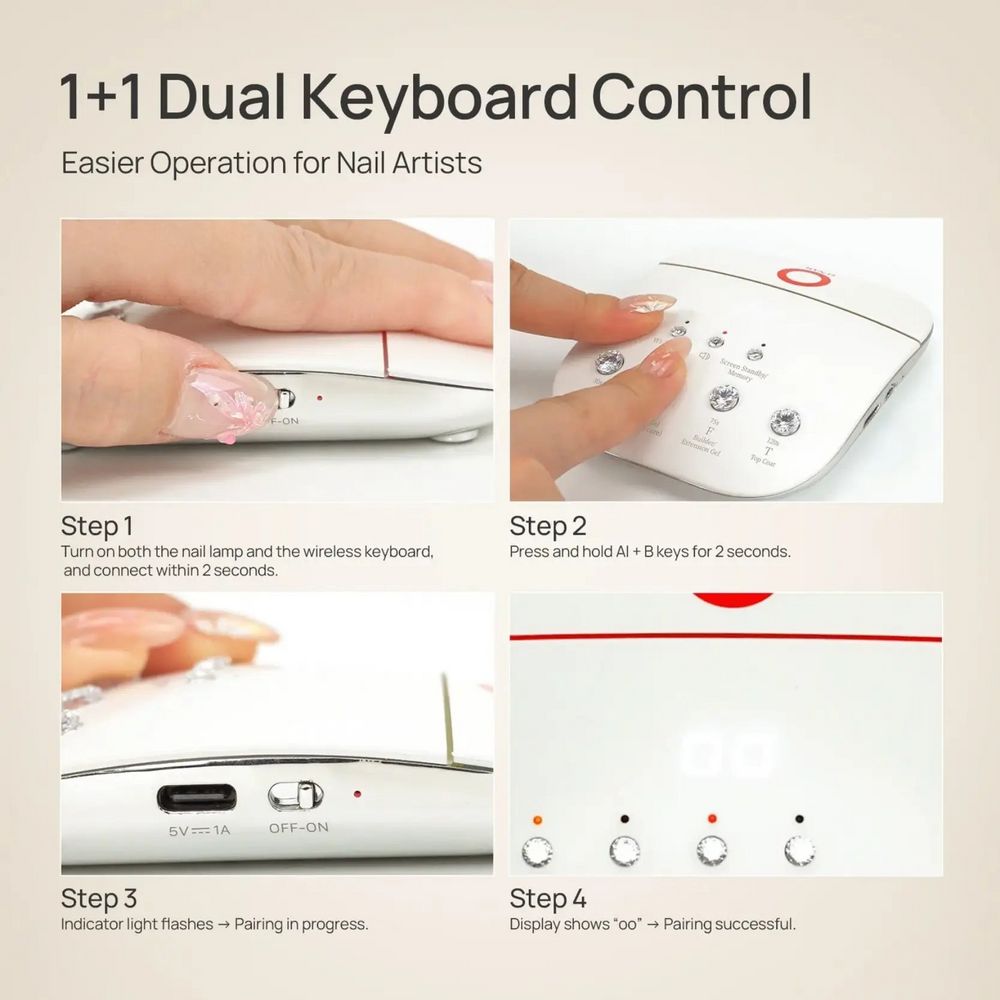
- Follow the pairing steps: activate the keypad pairing sequence, then power the lamp and observe the display confirmation.
- Simulate a failed pairing and practice restart routines for both devices until the process feels routine.
- Document the pairing indicator behavior and keep the manual’s wording near your station for quick reference.
Day 4: Timer and Mode Control Drills
Goal: Master the keypad’s timing functions and AI/non-AI mode switching to speed service flow.
- Practice selecting available timer settings and switching between AI and non-AI modes while performing mock cures.
- Use the keypad’s memory feature to store preferred timing and repeat the sequence until muscle memory forms.
- Time transitions between steps so you can estimate total service duration with the keypad in use.
Day 5: Workflow Integration and Station Ergonomics
Goal: Place the keypad for best ergonomics and integrate it into your standard service layout.
- Test keypad placement at multiple spots: centered, to the technician’s side, and within client reach when appropriate.
- Confirm that the keypad does not crowd other critical tools and that rhinestone keys remain unobstructed.
- Adjust lighting and surface padding to preserve the device’s glossy finish and present a polished client-facing look.
Compact rechargeable keypad on a delicate tulle backdrop.
Day 6: Speed and Repeatability Exercises
Goal: Convert deliberate actions into fast, repeatable motions suitable for a busy salon.
- Run timed sets where technicians operate the keypad between polish and curing steps to reduce idle time.
- Use the smart memory function to recall preferred sequences; repeat until transitions are seamless.
- Have observers note any unnecessary motions and refine hand placement to minimize reach.
Day 7: Full-Service Simulation and Team Review
Goal: Demonstrate a complete service using the keypad from start to finish and collect team feedback.
- Perform mock appointments that include client positioning, keypad use, and cleanup.
- Review consistency across technicians: pairing, mode selection, timing, and charging habits.
- Finalize a short checklist for every station that includes powered-on status, charged battery level, and cleaning notes.
Practice deliberately; small, repeated actions are what make wireless control feel effortless in daily service.
Implementation Notes, Pricing, and Inventory Tip
At a single-station price of $30, the keypad is an economical addition to service ergonomics—prices may change. Confirm pairing behavior and dual-control possibilities against the product manual before ordering additional units to ensure the control model fits your multi-station plans.
Care and Safety Reminder
Read the supplied instructions before routine use. Keep the keypad dry and prevent liquids or debris from entering the device. Switch it off before cleaning and use a neutral detergent on the exterior; avoid acidic cleaners and gel polish remover. Recharge periodically during extended storage and store within the specified temperature and humidity ranges to preserve battery health.